My First Lab Microscope – The Duo-Scope
Our Pick for the Best Kids Microscope
Looking for the best kids microscope? The Duo-Scope My First Lab Microscope by C&A Scientific is a great tool and toy for the budding scientist (even if that “budding scientist” is a 32 year old reviewer). We’ve tested many microscopes for little ones over the past few years, and this is one that keeps coming out on top.
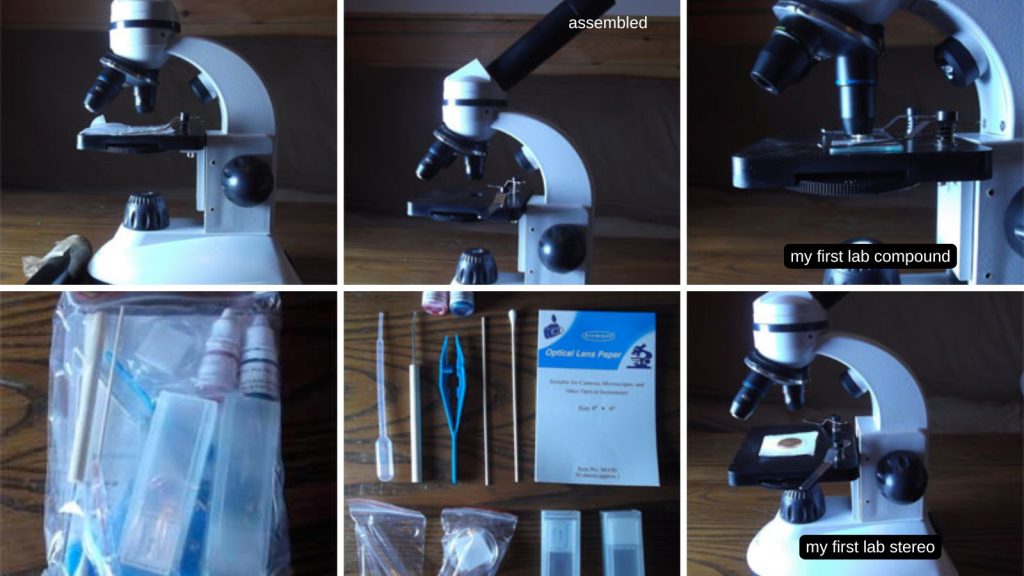
Choosing a microscope for your child isn’t always so cut and dry. You want a product that’s simple to use, fun, and educational without spending like you’re outfitting a college science lab. With all the options out there vying for a parent’s attention, it’s easy to end up with an empty wallet and a frustrated child.
That’s why we feel for features versus cost, the versatility and function of the Duo-Scope makes it one of the best beginner microscopes on the market. It may not come with as much in-depth microscopy information as the TK2 Scope, but it’s fun, easy to use, and allows kids to develop their science skills and an interest in the microscopic world.
One of the biggest selling points of the My First Lab microscope is that it functions as both a compound biological and stereo dissecting microscope. This means that you can look at either microscopic specimens on a flat slide or solid 3D objects like bugs and coins (more on this later). This powerful feature makes it essentially two microscopes in one.
Throw in tons of useful accessories and it’s easy to see why it was named Creative Child Magazine’s “Top Toy” a few years ago. With all the products out there, this was one of the best microscopes we found to satisfy the ravenous curiosity of a young scientist.
So let’s rip this baby open and show you what it looks like!
My First Lab Microscope Duo-Scope Review
Packaging and Setup:
I was excited to get the light, easy to carry box that contained the Duo Scope. The box itself is bright yellow and fun, describing the various ways you can use the microscope. I was a little disappointed to see a typo right off the bat, but it certainly wasn’t enough to ruin the first impression.
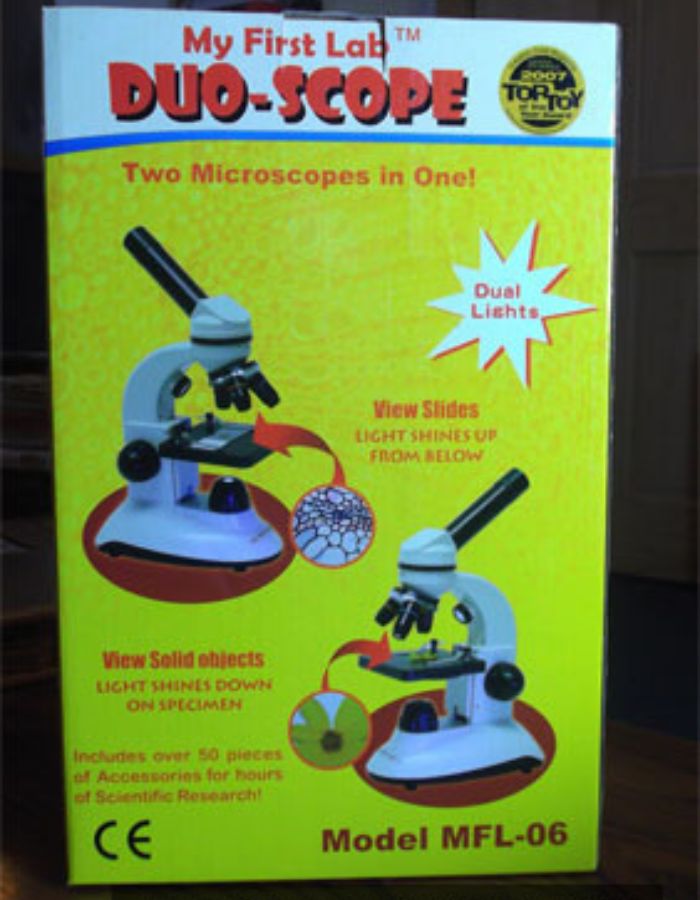
The My First Lab Microscope – I didn’t expect it to be so yellow! The My First Lab microscope itself comes neatly wrapped in a plastic bag and sits well protected in another egg carton style box. Most of it is already put together, and the package also contains the eyepiece, a manual, and a smaller box holding the accessories.
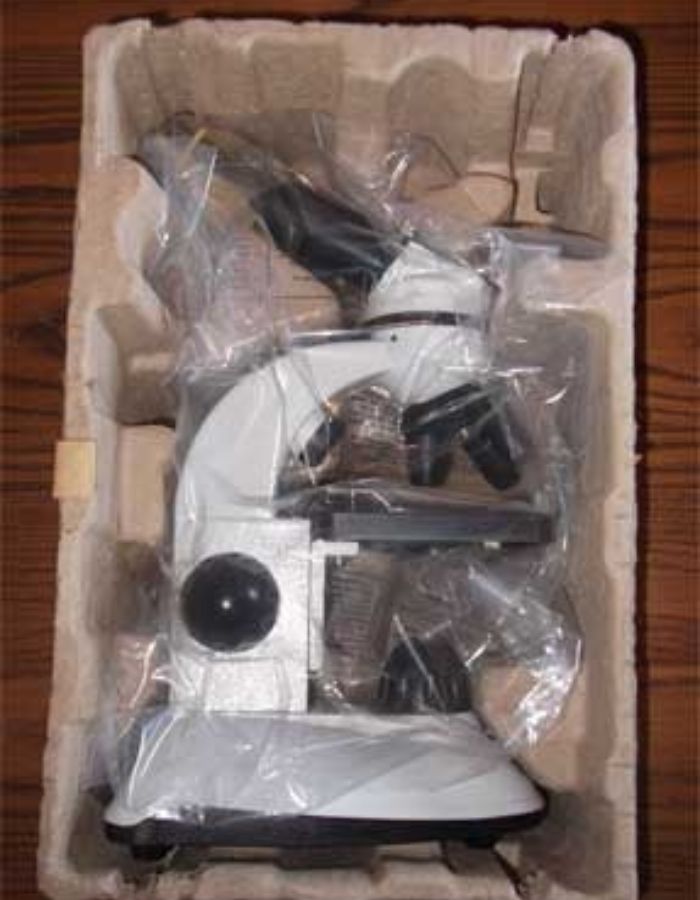
Assembly was painfully easy, something any parent can appreciate. Just screw in the separate eyepiece and you’re ready to go!
You’ll also need 3 AAA batteries, which aren’t included. At least they tell you that straight away on the box. After you steal them from the TV remote (isn’t that where all batteries come from?), they go in the bottom compartment.
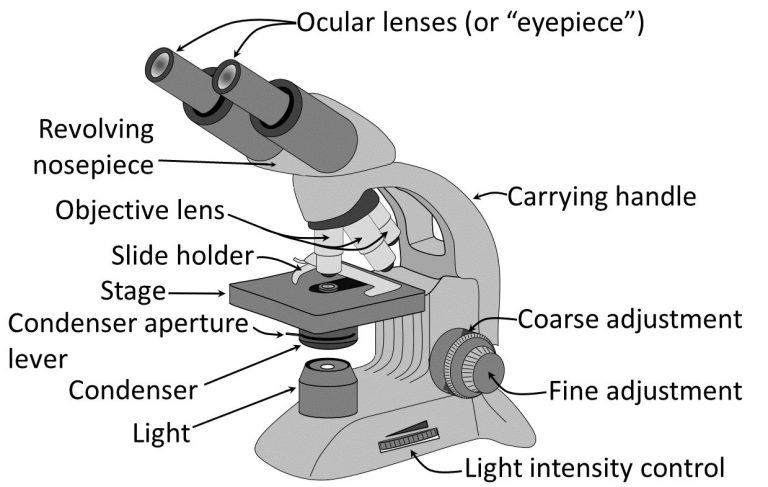
Below is the My First Lab microscope all set up with the parts labeled.
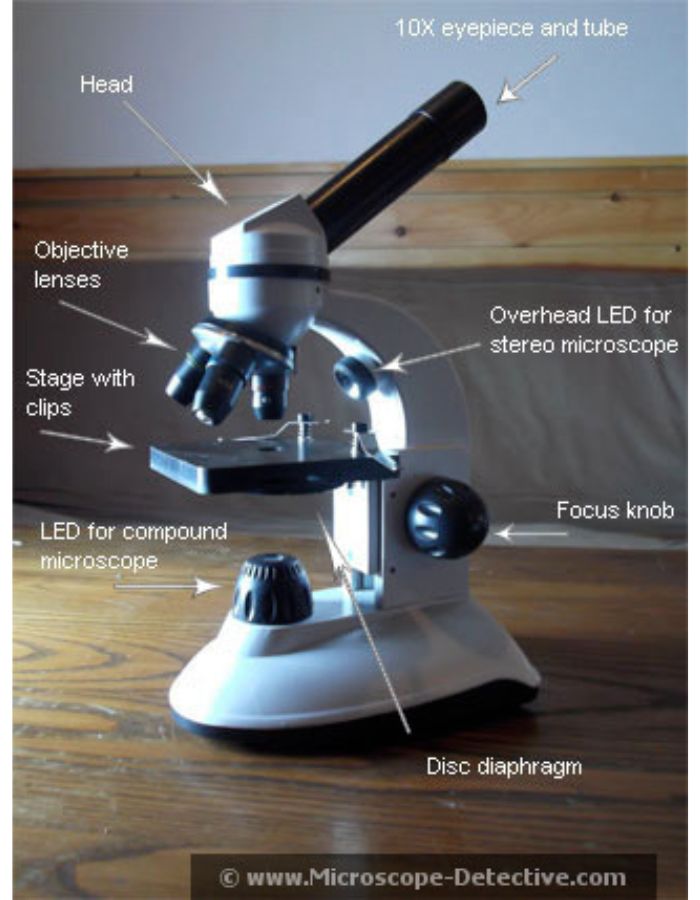
My First Lab Microscope Construction and Specifications:
Nobody likes a cheaply made product, especially when that product is going to have to withstand the rigors of a childlike mind and curious little hands!
After a thorough examination, I have to say that this kids microscope seems very sturdy. Yes, the main body is made up of a lot of plastic, but it’s by no means flimsy. The construction is solid and should definitely stand up to an average level of kid curiosity.
Of course I wouldn’t toss it around, drop it from the second floor, or treat it like a football but with a little care it should last a long time. I can attest to the strength of the eyepiece, as much to my horror it jumped out of my hands (all on its own!) and fell at least 4 feet onto a wooden table. It still worked fine after that. (Phew!)
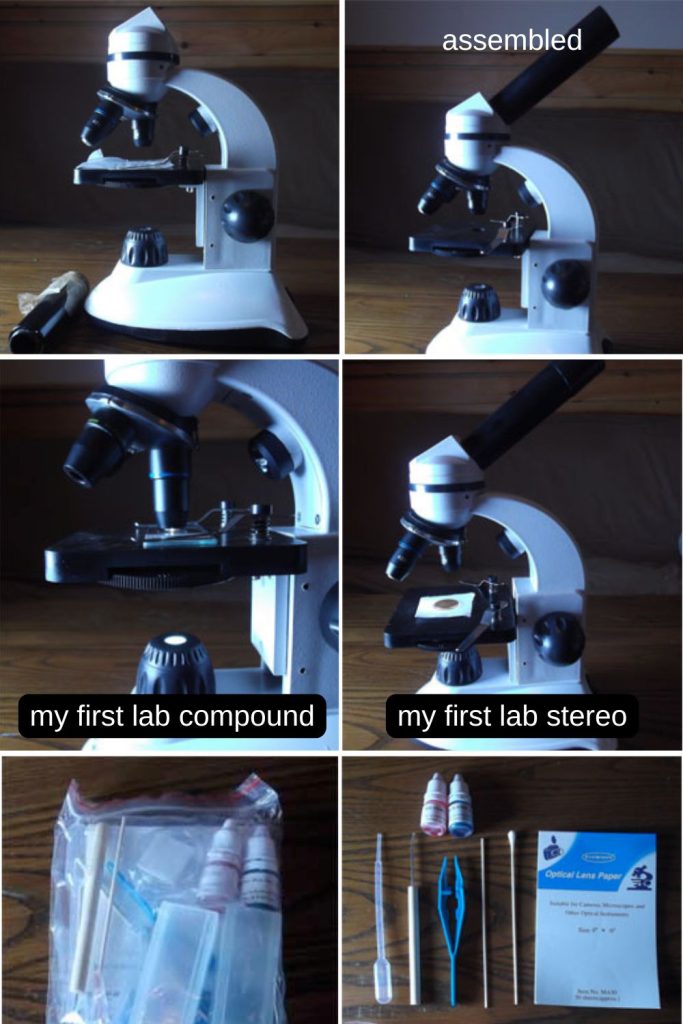
The specifications are:
- 10X Eyepiece (Quite sturdy, as I discovered the hard way)
- 4X, 10X, 40X Objectives (These are the rotating lenses at the top of the head. Multiply the lens number by the 10X power of the eyepiece and you get the true magnification. So using the 4X objective gives you a 40X magnification.)
- Dual focusing knobs (Perfect for both right or left handed kids)
- Rotatable head (I didn’t need to move the head but you can if you need to)
- Real glass optics (Which yielded very nice images)
- Disc diaphragm with 6 holes (For allowing more light to shine on slides)
- LED light sources (For upper and lower illumination of the specimen)
- Battery operated (So you can bring it outside)
- Accessory kit (More on that later)
- Manual
Many people don’t know what a disc diaphragm is. Also called an iris diaphragm, it’s simply a rotating disc that sits under the stage. Located between the slide and the light source, it has different sized holes so you can change the amount of light shining up through the specimen.
The smaller holes are for the lower magnifications, while the larger holes are for the larger 400X magnification. That said, there’s no hard and fast rule for using a disc diaphragm. Whether you need to rotate it depends on the level of contrast you want and how translucent the specimen is. It’s easy to find and move around so it’s just a matter of experimentation.
As for the rest of the My First Lab microscope, the dimensions listed in the manual are 4.5″ x 6.5″ x 11.5″ high. I was surprised at the 1.95 pound net weight. For the sturdy construction it is quite light.
The whole kit is very well built. There are no disturbing sounds of rattling pieces, the mechanisms work smoothly, and the objectives click soundly into place when changing the magnification.
Using the My First Lab Microscope:
A quick breeze through the manual was all I needed to get started using the Duo Scope. In moments I was looking at a prepared slide that came with the kit, and then combed the house for any spider web, dust bunny, or creepy crawlie that I could view. The optics and image quality were great, providing clear crisp images that weren’t blurry.
The big selling point of this kids microscope is that it’s two scopes in one, hence the Duo Scope title. It’s both a compound biological microscope (meaning you can use it to view flat slides), and a dissecting stereo microscope (meaning you can use it to view 3D objects). Switching between the two modes is merely a matter of flipping the switch on the back.
Left for compound, right for stereo…or was it the other way around?
When used as a compound microscope, a light comes from below to illuminate the slide. Simply place the slide on the stage (the main viewing platform), secure it with clips, and make sure the specimen is centered directly over the hole in the stage where the light shines through.
The Duo Scope offers 3 magnification settings in this mode: 40x, 100x, and 400x. You can switch between them by rotating the objective lenses (the 3 lenses sticking out of the head on the top). I tried this out myself by looking at one of the prepared slides that came with the kit. I chose the mouth smear, which in addition to being an awesome name for a band turned out to be incredibly fascinating to view.
At 40x I could see the cells, jagged yet geometric. You have to adjust the focusing knob on the side every time you change objective lenses, as the slide needs to be closer to the lens to see at the larger magnifications. Looking at the slide at 400x was pretty mind blowing, and my initial delighted disgust at viewing some cells on the inside of a stranger’s mouth fizzled into pure fascination.
It’s worth noting that the 400x magnification option could pose a potential problem for overzealous young ones. In order to see anything, the slide has to be so close to the lens that they’re almost touching. If you turn the focus knob too much or too quickly you could break the slide or damage the lens.
The 400x magnification needs the lens to be very close to the slide. Note also the light coming from the bottom to illuminate the specimen.
Switching between the magnification settings was easy and intuitive. Definitely not too complicated for a child, but I’d recommend a quick explanation and demonstration of the 400x setting so s/he knows to be a little more cautious when using the highest magnification.
Next I flipped the switch on the back to turn it into a stereo microscope. With this option, the light comes from above to illuminate a 3 dimensional specimen such as a rock, insect, coin, etc. There’s no point in having light come from below, as it won’t penetrate a solid object.
Pennies are, not surprisingly, less interesting to look at than dead bugs.
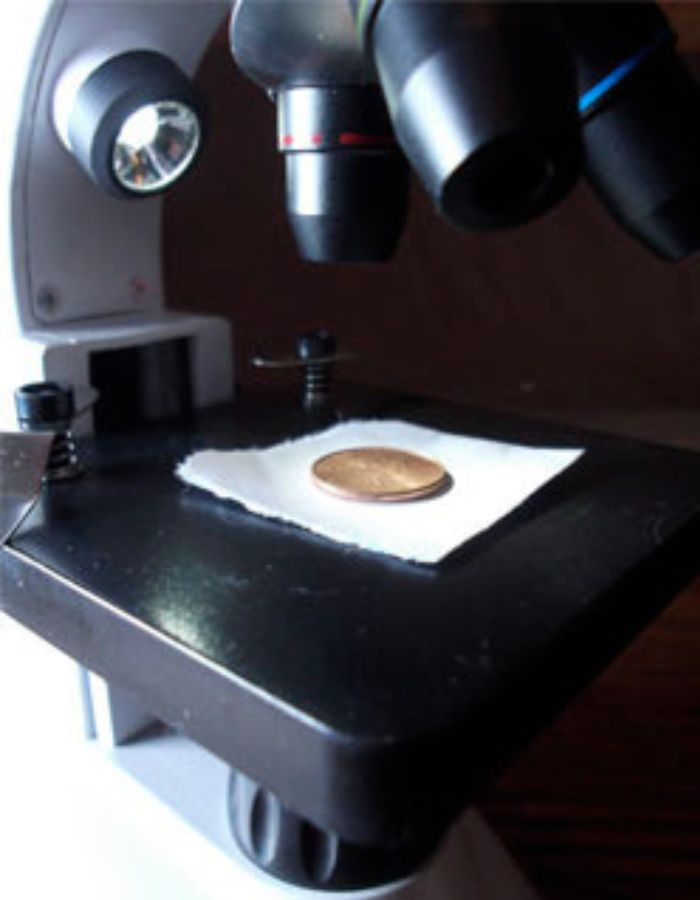
Using the stereo option is even easier, and possibly even more fun. Place the object on the stage (I used a penny in the picture below), and make sure it doesn’t fall through the hole. You may want to put it on a piece of white paper for easier viewing.
The My First Lab microscope offers 2 magnification settings here: 40x and 100x. The 400x option won’t work, as light won’t reach the specimen due to the extremely short focusing distance needed. This is common with stereo microscopes, which operate at lower magnifications.
Don’t be disappointed though. The two magnifications offered are outright awesome. I first looked at a penny, which was pretty cool. I then pinched off a budding little flower of a fuzzy houseplant and was very impressed by the amazing level of detail I could see, like looking at a jungle.
Keep in mind that when viewing a 3D object there are different levels to focus on. Since it’s not flat, the entire image isn’t clear all at once. So you’ll have to use the focusing knob to see the various levels of an object. This turned out to be a lot of fun, like zipping around your specimen up close in a tiny ship!
Overall I was very impressed with the functioning of the My First Lab microscope. It was easy to use, fun to play with, and the images were outstanding. Given how tech savvy kids are now, they should pick it up in no time. A quick demonstration and a few cautions by Mom or Dad should be all they need to get started.
Included Materials:
The My First Lab microscope comes with some fun accessories, although not over 50 as they advertise on the box. The included accessories are:
- 5 blank slides
- 4 prepared slides
- A concave blank slide
- Cover glass
- Plastic dropper
- Two bottles of stain (non-toxic food coloring)
- Slide labels
- Lens paper
- Forceps
- Test tube
- Petri dish
- Teasing needle
Although not exhaustive, this is a great collection of accessories. The options these accessories open up really lets a kid delve deeper into microscope use and allows for hours of scientific “play”.
For the prepared slides, our kit came with pollen, mouth smear, paramecium, and salt crystals. I’m not sure if those come with every kit or if they have a few more that they rotate, but I enjoyed them all (especially the mouth smear and the salt crystals). These prepared slides let a kid start using the microscope right away without having to do anything else. This instant gratification will keep them interested in the beginning, when attention spans sometimes waver.
To further that interest, the kit comes with everything you need to make your own simple slides. You can put any sort of crystals, hair, or pollen on the blank slides, or try a drop of pond water on the concavity slide.
Many of the accessories are useful with 3D objects too, such as using the teasing needle or tweezers to move around an insect. You could also put a small piece of bread or food in the Petri dish, which should be revoltingly enthralling after a few weeks for kids and adults alike!
Some of these objects are glass or are a little sharp so I would recommend adult supervision for the younger set. Overall the accessories are easy to use and relatively harmless.
This kids microscope also comes with a helpful manual that contains instructions, lists, and some observation ideas. It gives directions on how to make your own slides, and how to best maintain the My First Lab microscope. The manual itself is short (about 10 pages), but has everything you need to know in it. It’s informative, easy to read, and makes sense.
My First Lab Microscope Customer Service:
As Microscope Detective purchased this item directly for me to try and wasn’t given it for free, we didn’t really have any contact with the maker C&A Scientific. However, a little research revealed that this company has been around for a while and makes many different types of highly rated microscopes.
The manual also says it comes with a limited one year warranty. If you have a problem resulting from a manufacturing defect under normal use, they’ll repair or replace it for you for free. Of course that doesn’t cover damages incurred from accidentally stepping on it in the middle of the night, but they do say they’ll fix a legitimate defect for free (you pay shipping).
Judging by their many successful products and my personal experience with the Duo Scope, C&A Scientific seems on the level and I would purchase something from them again.
You can find the My First Lab Microscope on Amazon.
Pros and Cons of the My First Lab Microscope
Pros:
- Good quality glass optics
- Two microscopes in one: both compound and stereo
- Easy to use
- Sturdy construction
- Useful accessories
- Helpful manual
- Usually retails for between $60 and $70, a great price for all the features
Cons:
- Carrying case or dust cover not included (they do advise you to use the plastic bag it comes in as a dust cover, but it would be nice to have a real one).
- Upper and lower lights can’t be turned on at the same time, which may make it difficult to view translucent specimens that need lots of light.
- The box says over 50 accessories, but I count only around 20. Is this advertising hyperbole or am I just missing something?
My First Lab Microscope Summary
The My First Lab Microscope is a great product in a very reasonable price range. It is designed to nurture a love of science in kids, and made to last and grow with the user. If you’re into science, this could entertain anyone for days. I had a blast using it.
The downsides seemed small when compared to the advantages. It’s way under $100, easy to use, comes with lots of accessories, and provides a really nice image. What more could a parent want?
Ultimately, it’s just a lot of fun. After I used it I left it set up for my better half to play with, which lasted far longer than I thought it would. This is the kind of item that can really change how you see life, take you from ignorance to knowledge, and engender a deep fascination for the world around you.
The My First Lab Microscope Is Recommended For:
A better statement would be for whom it isn’t recommended. It’s not powerful enough for a serious scientist or graduate student, but should be perfect for anyone else looking for a simple and fun compound microscope, stereo microscope, or both!
The box says that it’s for kids in the eight and up age bracket, but I feel my 7 year old nephew could use and enjoy it. The kit includes both delicate and sharp instruments, so if you buy it for a younger scientist you may want to supervise and edit the kit as needed.
Of course, if you’re a curious adult this could be a great purchase too! Although it is a kids microscope, I wouldn’t classify it as a simple “toy”. Adults needing to look at slides up to 400X can get a lot of use out of it, as could entomologists, jewelers, stamp collectors, or anyone wanting to view 3D objects for work or fun.
If you’re looking for something a little more comprehensive with more experiments included take a look at the TK2 Scope. It’s a complete biology kit that offers a little more for teachers, home schooling parents, or kids who really love biology. Yet if you’re looking for a versatile and fun beginner kids microscope, the Duo Scope is the one.
Now if you’ll excuse me, I have to go find something else cool to look at. I’m sure there’s a dead bug around here somewhere!
You can find the My First Lab Microscope on Amazon.

One Comment
Comments are closed.